34 KiB
| title |
|---|
| Linux 201: Web Server Setup |
Introduction
Hello, and welcome to Linux 201! This Lab sheet will guide you through setting up a Linux-based web server, and look at a number of other useful aspects of server management and administration along the way.
If you follow this lab sheet to the end, you should:
- Understand the process of setting up a web server
- Understand why security is important when setting a web server.
- Have setup a basic web server to serve static files
If you have any questions, please ask! There should be a number of Freeside Admins experienced with server administration to help you out should you get stuck.
It is worth mentioning before we begin though that this lab sheet will not be showing you how to do the following:
- Set up HTTPS - This requires that you have a domain name.
Despite this, links to some useful tutorials showing you how to do these things will be provided at the end of this lab sheet. In addition, you can always ask on the Freeside Discord or Forums, and we'll be happy to help you out:
Finally, before we get started, a word on the rationale behind the software we're going to be using in this tutorial. Firstly, Ubuntu Server is the server version of the highly popular Ubuntu Linux distribution - which has heaps of support out there should you run into difficulties in the future after this lab. It's well tested, and great for beginners.
Secondly, we're going to be using Nginx as our web server here. Although most people may be heard of or perhaps even used Apache before, Nginx is the web server of choice here for several reasons:
- It's much higher performance than Apache
- It's event-based, not thread-based like Apache - which means it can handle more requests faster with a lower overhead
- It's more powerful than Apache - especially when you start getting into the more advanced use-cases.
- It's rapidly becoming (if not already) an industry standard
In short, skills in Nginx will likely be much more useful in the future - especially when dealing with reverse-proxying to application servers, which will be a topic covered in Linux 301.
Getting Started
This workshop will make use of a virtual machine running on the Department on Computer Science's cluster. 1 virtual machine has been allocated per student attending the workshop. To access it, click on the following link:
http://www2.dcs.hull.ac.uk/people/cssaph/FreesideLinux201/
Note that if you have turned up to the lab without having first filled out the registration form, you won't have access to a virtual machine. This is easily fixed however - simply talk to a Freeside Admin and they will get one allocated for you.
Once you've got access to your virtual machine, you can begin setting it up by following the instructions below. As it's a server, it won't have a graphical user interface. Instead, you'll be configuring it through the command line, or terminal as it's known in the Linux world.
The Linux terminal (in this case) is Bash, and is very similar to the Windows command prompt, if you have any experience with that. There are a few command differences, but if you have experience with 1 then the other should feel at least somewhat familiar.
If you don't have command-line experience yet, don't worry! It's all part of the learning process. In short, on a command-line (or terminal), you enter text-based commands to tell the computer what you want it to do. Much like any other programming language, there are patterns and syntax rules - so try to look out for those. For example, things are always space-separated, and the first word is always the name of the command to execute:
nano myfile.txt
The above command launches the nano text editor and tells it to open myfile.txt. If you forget the space, like this:
nanomyfile.txt
...then the server is probably going to get rather upset and throw an error:
nanomyfile.txt: command not found
Thankfully, the error message in this instance is fairly straight-forward and tells us what went wrong. In other cases the problem might not be so obvious, so don't forget that you can ask any of the Freeside Admins for assistance.
A good reference for Linux commands can be found here: https://files.fosswire.com/2007/08/fwunixref.pdf.
Setting the hostname
The first thing we should do to our server is to give it a unique hostname. On Ubuntu Server 18.04, this is fairly easy to do:
sudo hostnamectl set-hostname INSERT_HOSTNAME_HERE
For this workshop, we'll use a standard naming convention. Please set your hostname to be the following:
linux201-server-XX
....where XX is the number of your server from the list linked to above. Notice the sudo in the command above. It's short for super-user do, and tells Linux that you want to run a command as an administrator. You'll have to type your password for this, which is a key security mechanism that's built-in to Linux. If you've been to Linux 101, it was explained in more detail there. For the curious, the Linux 101 slide deck can be found here:
https://starbeamrainbowlabs.com/labs/Linux101/
You might need to quickly restart your shell for this to take effect:
exec bash
You should now see that the prompt has changed to reflect the new hostname. If not, try rebooting:
sudo reboot
Basic Security
root is the administrative account of Linux systems. Owing to the extremely broad permissions granted to root accounts, one of the core tenants of Linux security is ensuring each user has their own account.
This is because root can be used, even accidentally to damage or destroy the system because of its extensive permissions. Having separate accounts, such as "yourusername" also increases accountability and decreases the likelihood of system damage.
Normally, this is handled by your operating system installer, so you shouldn't need to create a new account manually here. If you'd like to rename the default user account here, this is how you'd do it.
This section is optional. If you'd prefer, you can skip this section and move on to the next section, setting your password.
To create a new non-root account, do the following:
sudo adduser "yourusername"
We should create the new user as root, so don't forget to prefix it with sudo (though if you're already logged in as root, there's no need for sudo. You can tell if you're logged in as root by the last character in the prompt: if it's a dollar $ then you're a regular user and need to use sudo, if it's a hash # then you're the root user).
Execute the command as above, replacing "yourusername" with a desired username.
During the setup, you may be asked for a password along with other information. You may customise this information as you wish.
Now that the user has been created, we should ensure that that user can execute commands with escalated permissions - i.e. as the root account. These are called sudo permissions. These can be assigned to your new account like this:
sudo usermod -aG sudo yourusername
Execute the command as above, replacing "yourusername" with the user you created in the previous step.
This adds your new user account to the sudo group of users on the system, which is a group of users permitted to use the sudo command to run commands as other users - including root.
At this point, you should be able to logout and log back in as the new user account you've just created - you should do this now.
If you're creating a new account to replace the default non-root user account, it's a good idea at this point to delete the old default user account now. This helps keep your VM secure, as fewer user accounts (note: system accounts are a different topic) mean fewer potential entry points for attackers.
Don't forget also that you should always know why you're typing your password. This is a key security mechanism in Linux: anything that needs administrative privileges should be done through sudo, and sudo requires your password. If it didn't require your password, then anything running under a user account that has sudo privileges would be able to run a command as root at any time, which is obviously a bad thing.
Setting your password
If you didn't change the default user account that's come with your VM (or even if you did), you should probably change your account password. Leaving your account password as the default is the best way to invite an attacker in to hack your server.
Thankfully, this is really easy to do. Simply enter the following command:
passwd
It will ask you for your current password, and ten for a new password twice. Once done, try logging out and then back in again to see that your new password has been applied. Note that this will also affect things when you're using sudo: you should use your new password instead of the old one, since the password you use with sudo is synced with your local user account.
It's also worth mentioning at this point that storing said password in a secure password manager would be a good idea, rather than writing it down in a text file. Password databases are encrypted with a master password, which is much more secure. Many password managers exist, from KeePass to Firefox Lockwise to BitWarden, and many more.
Securing SSH
At this point if you're still using the physical VMware console, it might be worth signing in to your VM via SSH. Standing for Secure SHell, it's used by servers and their administrators across the world to talk to one another. TO do this, you'll need the IP address of your server. Get this like so:
hostname -I
Then, open PuTTY TODO: Finish this
If someone manages to get in who isn't supposed to, they could do all kinds of damage!
The first, and easiest thing we can do it improve security is to prevent the root user logging in. We already have a non-root account that we use sudo with, so why allow direct access to root at all? Open /etc/ssh/sshd_config for editing like this:
sudo nano /etc/ssh/sshd_config
This will open the nano command-line text editor. Others exist, but they are either not installed by default or more difficult to use. You can navigate with the arrow keys. Find the line that says something like this:
PermitRootLogin yes
....and change it to
PermitRootLogin no
You may need to uncomment the line by removing the # symbol preceding it.
Once done, restart the ssh server like so:
sudo systemctl restart ssh
Your configuration might be slightly different (e.g. it might be PermitRootLogin without-password) - but the principle is the same. This adds an extra barrier to getting into your server, as now attackers must not only guess your password, but your username as well (some won't even bother, and keep trying to login to the root account!).
Key-based authentication
So we've created a new user account with a secure password (tip: use a password manager if you have trouble remembering it :-)) and disabled root login. Is there anything else we can do? Turns out there is.
Passwords are not the only we can authenticate against an SSH server. Public private keypairs can be used too - and are much more secure - and convenient - than passwords if used correctly. They are a pair of files on your computer, which are used when you try to login instead of a password. Without the private key, you can't login.
The exact way you do this depends on the operating system of the local machine you are using to connect to your server.
For Linux users
If your local machine is a Linux computer, then this is the section for you. If your local machine is a Windows computer, then skip this section and move onto the one below entitled "For Windows users".
If you are using Linux on your local machine generate your own public-private keypair like so:
mkdir $HOME/.ssh
ssh-keygen -t ed25519
It will ask you a few questions, such as a password to encrypt the private key on disk, and where to save it. Once done, we need to tell ssh to use the new public-private keypair. This is fairly easy to do, actually (though it took me a while to figure out how!). Simply edit ~/.ssh/config (or create it if it doesn't exist), and create (or edit) an entry for your ssh server, making it look something like this:
Host {bobsrockets.com}
	Hostname        {ip_address}
	Port			22
	IdentityFile 	{path/to/private/keyfile}
Change {bobsrockets.com} to a short name that's easy to remember. You'll be able to SSH into your server later with ssh short_name.
Change {ip_address} to match the IP address of your server (or, if you're lucky enough to have a domain name pointed at your server, use that instead).
It's the IdentityFile line that's important - replace {path/to/private/keyfile} with the path to your key file (e.g. ~/.ssh/id_ed25519).
With ssh configured, we can use a handy little utility called ssh-copy-id to copy the SSH public key to the server. Do that like this:
ssh-copy-id `{username}@{hostname}`
Where {username} is the username of the new user account you created earlier, and {hostname} is the short code from before when you editing your ~/.ssh/config file.
For Windows users
If your local machine is a Windows computer, then this is the section for you. If your local machine is a Linux computer, then skip this section and move onto the one below entitled "For Windows users".
This section will assume that you are using PuTTY (https://putty.org/) to connect via SSH to your server. Content in this section is taken from this DigitalOcean tutorial 4.
Start the PuTTYgen program through your Start Menu, or by launching the puttygen.exe portable executable. The key generation program looks similar to this:
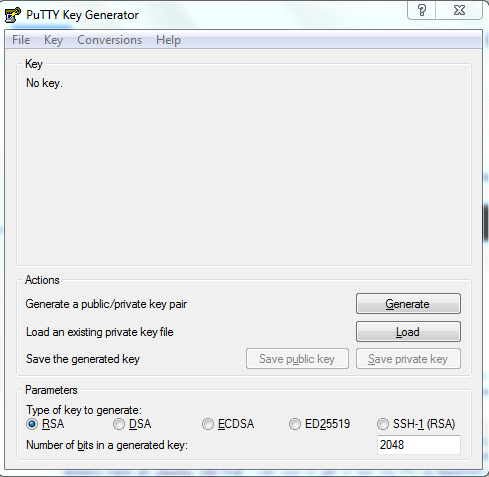
(Above: A screenshot of PuTTYgen. Taken from this DigitalOcean tutorial 4.)
Set the key type to ED25519, and click the generate button.
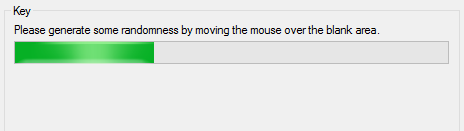
You might be prompted to "generate some randomness by moving the mouse over the blank area". This randomness, known as entropy, is used to create keys in a secure fashion so that other people can't reproduce them.
When the key is generated, you’ll see the public key displayed in a text box. Save this somewhere safe for later. Be sure to scroll within the text area so you copy the entire key.
Next, you’ll be prompted to enter a passphrase for your SSH key. This improves security by preventing someone who gains access to your private key from using it without also knowing the passphrase. You’ll need to provide your passphrase every time you use this key (unless you use SSH agent software that stores the decrypted key).
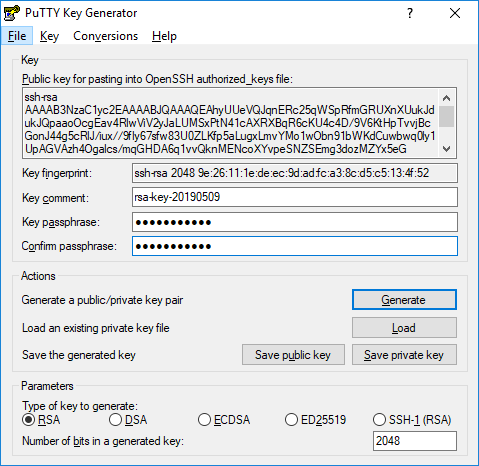
When you’re done, click the "save private key" button and select a secure location to keep it. You can name your key whatever you’d like, and the extension .ppk is automatically added.
If you have not entered a passphrase, you will be asked to confirm that you want to save the key without one. We strongly recommend using a passphrase, but you can press enter to bypass this prompt.
Next, you need to tell your server about your new SSH key. This is done by editing the ~/.ssh/authorized_keys file. The ~/.ssh/ directory might not exist, so we may need to create that too. Do that like this:
mkdir ~/.ssh/;
nano ~/.ssh/authorized_keys
Of course, don't worry about any errors telling you that ~/.ssh/ already exists. Next, paste in your public key that saved earlier into the nano text editor. Save it and exit (Ctrl + X, then Y, then Enter), and then ensure it has the correct permissions like so:
chown -R username:username ~/.ssh
chmod 0700 ~/.ssh
chmod 0600 ~/.ssh/*
...replacing username with the username of the account you created earlier.
Now, try opening a new instance of PuTTY and logging into your server with the public key. Before hitting the login button, go to "Connection" -> "SSH" -> "Auth" and select your .ppk file.
If all is well, you should now be logged in with your new public/private keypair.
Setting up a firewall
Firewalls control how data is allowed to travel in and out of your computer. In Ubuntu, a firewall called ufw, the 'uncomplicated firewall' is already present. It acts as a nice front-end to iptables, which I find to be difficult to understand and use. We will be using that as our firewall. If for some reason it is not installed already, install it like so:
sudo apt install ufw
Activation
Ufw, by default, allows all outgoing connections and denies all incoming connections. This means that if you are using ssh to connect to your server, you will need to open the appropriate ports first before enabling ufw. Do that like this:
sudo ufw allow 22/tcp
Ufw will automatically configure iptables to allow incoming connections on port 22 that use tcp. I will talk more about allowing and denying different connections later.
Just in case ufw blocks your ssh connection and you are unable to get back in, you can use another program called at to schedule the disabling of the ufw so that you can get back in again. If you don't have it installed, you can install it with sudo apt install at.
sudo at -vM now +10 minutes
ufw disable
^D
Where ^D stands for CTRL + D. Now that you have it set such that ufw will disable itself in 10 minutes time, we go ahead and turn ufw on:
sudo ufw enable
It will warn you that this may disrupt any existing ssh connections you have open. Reply yes to this. Once it have been enabled successfully, you should check that you can still ssh into your server (if that is the method that you are using to control it). If yes, great! If not, ufw will disable itself in 10 minutes and then you can try again.
Now that we have ufw enabled, we can cancel the at job we created to disable ufw. Type sudo atq to list the jobs you have schedules, and sudo atrm <number> to remove it, where <number> is the number of the jobs that you want to delete.
You may also want to check the status of ufw to make sure that it is enabled, or to get a list of the rules that are currently in force. You can do that like this:
sudo ufw status
Status: active

To                         Action      From
--                         ------      ----
22/tcp                     ALLOW       Anywhere
22/tcp (v6)                ALLOW       Anywhere
Allowing connections
Since we're going to be setting up a web server, we'll need to allow it through our new firewall. Doing so is easy. Simply do this:
sudo ufw allow 80/tcp
Ufw will automatically configure iptables, in this example, to allow all connections on port 80 that use TCP. It will also configure it appropriately for both ipv4 and ipv6.
If you ever want to incoming connections on another port in the future, replace 80 with the port number you want to allow and tcp with udp if needed.
Ufw also understands several protocol names, and can configure itself accordingly:
sudo ufw allow http
sudo ufw allow imap
Installing a Web Server
With our server secured, we can now install our web server. In this tutorial, we'll be using Nginx. Nginx is very powerful and much more efficient 5 than Apache. This is done with apt, Ubuntu's package manager:
sudo apt install nginx
The apt package manager manages the software and libraries installed on a Linux computer. Other package managers exist too, which are used in other distributions of Linux (such as Arch Linux, Alpine Linux, and Fedora). The concept is broadly similar to a package manager you might use to manage the dependencies of a program you're writing, such as NuGet 6 (for .NET) and NPM 7 (for Javascript).
Anyway, with Nginx installed, we should be able to test it out - just as soon as we allow it through our firewall:
sudo ufw allow http
Testing it out
At this point you should bee able to type the IP address of your server into your web browser and see the default configuration page. You can obtain your server's IP address by using the hostname command like so:
hostname -I
Another, but less reliable, way of finding your IP address is to use an online service. Such services report back to you your external IP address. If your server is located on a complex network, the IP address such a service reports may not be the local IP address of your server, however. You can utilise a service like this as follows:
curl https://icanhazip.com/
You might need to install curl with sudo apt install curl.
Once you have determined your server's IP address, enter it into your web browser like so: http://1.2.3.4/
You should see a page like this:
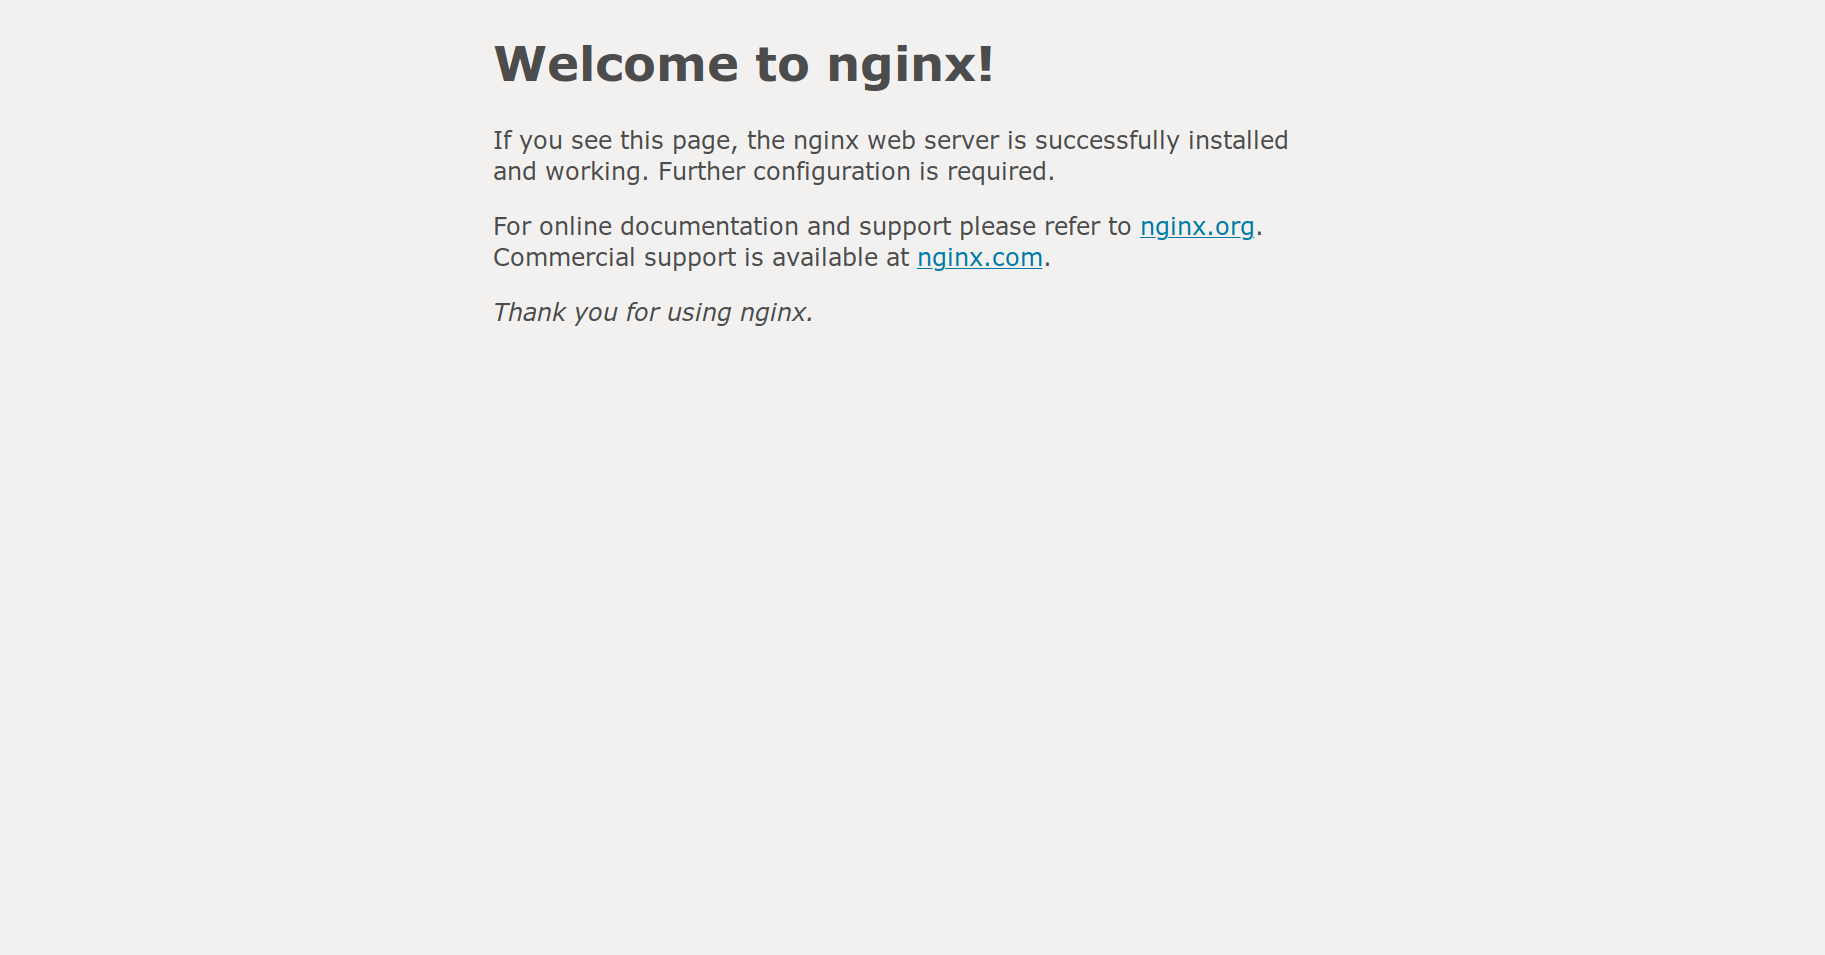
If you don't see something like the above, please ask for help.
Customisation
Now that we've got our web server installed, we can customise it to our liking. This is quite easy to do. On Linux, almost everything is driven by configuration files. These are stored in the /etc directory - and Nginx is no exception. Nginx stores its configuration files in /etc/nginx. There a few important files and directories here:
| File | Purpose |
|---|---|
/etc/nginx/nginx.conf |
The main configuration file. Global settings are defined here. |
/etc/nginx/sites-available/ |
The virtual host configuration files. Put website configuration files here. |
/etc/nginx/sites-enabled/ |
The enabled virtual hosts. This directory contains symbolic links 8 to the sites-enabled directory. |
Nginx, like most web servers, can service multiple web servers at the same time. This is done by using a variety of techniques to determine what domain name you have entered into your address bar (namely the Host HTTP header and, in the case, of HTTPS, Server Name Indication 9). To this end, it supports multiple virtual hosts - which are basically configuration files that tell it which website to serve under which circumstances.
Try looking at some of the different configuration files in the /etc/nginx directory to get a feel for how it works - particularly /etc/nginx/nginx.conf.
In our case, we already have a default virtual host created for us. It's located in /etc/nginx/sites-available/default. Open it for editing now:
sudo nano /etc/nginx/sites-available/default
# or, if you're a `vim` user:
sudo vim /etc/nginx/sites-available/default
nano is usually best for beginners, as it's easier to use. You might see something like this:
##
# You should look at the following URL's in order to grasp a solid understanding
# of Nginx configuration files in order to fully unleash the power of Nginx.
# https://www.nginx.com/resources/wiki/start/
# https://www.nginx.com/resources/wiki/start/topics/tutorials/config_pitfalls/
# https://wiki.debian.org/Nginx/DirectoryStructure
#
# In most cases, administrators will remove this file from sites-enabled/ and
# leave it as reference inside of sites-available where it will continue to be
# updated by the nginx packaging team.
#
# This file will automatically load configuration files provided by other
# applications, such as Drupal or Wordpress. These applications will be made
# available underneath a path with that package name, such as /drupal8.
#
# Please see /usr/share/doc/nginx-doc/examples/ for more detailed examples.
##

# Default server configuration
#
server {
	listen 80 default_server;
	listen [::]:80 default_server;

	# SSL configuration
	#
	# listen 443 ssl default_server;
	# listen [::]:443 ssl default_server;
	#
	# Note: You should disable gzip for SSL traffic.
	# See: https://bugs.debian.org/773332
	#
	# Read up on ssl_ciphers to ensure a secure configuration.
	# See: https://bugs.debian.org/765782
	#
	# Self signed certs generated by the ssl-cert package
	# Don't use them in a production server!
	#
	# include snippets/snakeoil.conf;

	root /var/www/html;

	# Add index.php to the list if you are using PHP
	index index.html index.htm index.nginx-debian.html;

	server_name _;

	location / {
		# First attempt to serve request as file, then
		# as directory, then fall back to displaying a 404.
		try_files $uri $uri/ =404;
	}

	# pass PHP scripts to FastCGI server
	#
	#location ~ \.php$ {
	#	include snippets/fastcgi-php.conf;
	#
	#	# With php-fpm (or other unix sockets):
	#	fastcgi_pass unix:/var/run/php/php7.0-fpm.sock;
	#	# With php-cgi (or other tcp sockets):
	#	fastcgi_pass 127.0.0.1:9000;
	#}

	# deny access to .htaccess files, if Apache's document root
	# concurs with nginx's one
	#
	#location ~ /\.ht {
	#	deny all;
	#}
}


# Virtual Host configuration for example.com
#
# You can move that to a different file under sites-available/ and symlink that
# to sites-enabled/ to enable it.
#
#server {
#	listen 80;
#	listen [::]:80;
#
#	server_name example.com;
#
#	root /var/www/example.com;
#	index index.html;
#
#	location / {
#		try_files $uri $uri/ =404;
#	}
#}
There's a lot of 'stuff' here, so let's break it down. Nginx works on the concept of servers. Each virtual host has it's own server { } block in a configuration file inside /etc/nginx/sites-available. Lines that start with a hash # are comments - and are ignored by Nginx (just like Python and Bash comments).
The listen directives tell Nginx to listen on Ipv4 and IPv6 for requests.
The root /var/www/html; directive tells Nginx where to find the files that it should serve. For our example, let's change this from /var/www/html to /srv/www.
The location { } blocks allow us to tell Nginx to do specific things for specific subdirectories. They are quite complex, and are out-of-scope of this workshop. However, the default configuration file contains some links that you can use to find out more - and you can always ask on the Freeside Discord 1 too.
You may wish to enable directory listing 10, so that if Nginx does not find an index.html file it will list the contents of the directory instead. You can do this by creating a new line directly below the root directory like so:
autoindex on;
Once you've finished editing the file, save and close it with Ctrl + X, then Y, then Enter (if using nano), or Esc followed by typing :wq for vim.
With the configuration file edited, we should restart Nginx. Before we do that though, let's test that configuration file:
sudo nginx -t
If all goes well, Nginx should say something like this:
nginx: the configuration file /etc/nginx/nginx.conf syntax is ok
nginx: configuration file /etc/nginx/nginx.conf test is successful
If it doesn't, then go back and check the syntax of the configuration file you edited. You might want to ask for help.
Before we reload Nginx though, we need to create that new web root directory we decided on earlier. Let's do that now:
sudo mkdir /srv/www
sudo chown -R www-data:www-data /srv/www
sudo chmod 0775 /srv/www
With that in place, you can now reload Nginx like so:
sudo systemctl reload nginx
This will cause Nginx to reload it's configuration files from disk without restarting. Not all services support this, but if they do it's handy to take advantage of it.
The final step here is to upload some files to your new web server to serve. To do this, we will need to ensure that our user account has permission to write to the new folder. Do tha like this:
sudo usermod -a -G www-data YOUR_USERNAME_HERE
This adds your user account to the www-data group. You will need to log out and log back in again at this stage for the change to take effect.
Actually uploading files can be done using SFTP. Windows users can use WinSCP Portable 11, while Linux users can use their native file manager (try entering sftp://username@1.2.3.4/ into your address bar).
Once you have uploaded some files to your web server, try refreshing your web browser! You should see your new website appear before your eyes.
Conclusion
We've looked at setting up a basic Linux web server with Ubuntu Server 18.04 and Nginx. We've done this by first taking some basic steps to secure our server, and then installing and configuring the necessary software.
This workshop should provide you with a good starting point from which to explore more complex uses for Linux. For example, you could now use your new web server to serve a personal static website and blog 12, or you could take your skills further and learn about containerisation technologies such as LXD 13 and Docker 14. You could even learn how to deploy your own application to a Linux server using a system service 15 and syslog 16 - the possibilities are endless!
Be sure to join the Freeside Discord 1, where you can learn more about Linux and hang out with other Linux users.
References and Further Reading
- Linux command reference (https://files.fosswire.com/2007/08/fwunixref.pdf)
- Learn your terminal (or command line) (https://starbeamrainbowlabs.com/blog/article.php?article=posts/242-Learn-Your-Terminal.html)
- Nginx (https://www.nginx.com/)
- How to Secure a Linux Server (https://github.com/imthenachoman/How-To-Secure-A-Linux-Server/)
- SSL Certificates (https://letsencrypt.org)
- How to secure Nginx with Let's Encrypt on Ubuntu Server 18.04 (https://www.digitalocean.com/community/tutorials/how-to-secure-nginx-with-let-s-encrypt-on-ubuntu-18-04)
- Freeside Discord Invite (http://discord.freeside.co.uk/)
- Static Site Generators Comparison (https://www.staticgen.com/)
-
https://www.digitalocean.com/docs/droplets/how-to/add-ssh-keys/create-with-putty/ ↩︎
-
Static site generator comparison: https://www.staticgen.com/ ↩︎
-
https://starbeamrainbowlabs.com/blog/article.php?article=posts/326-systemd-service-files.html ↩︎
-
https://starbeamrainbowlabs.com/blog/article.php?article=posts/345-logrotate.html ↩︎