4.3 KiB
Hardware
Constructing the hardware for the LoRaWAN Signal Mapper is a 2-step process:
- Construct the circuit
- 3d-print the box
Prerequisites
You'll need a number of items ready and at hand before you start. A full parts list is given below. In addition, having the following items to hand would probably be helpful:
- A multimeter, to test the parts of the circuit are connected properly and functioning as intended should you run into difficulties
- 4 x AA Batteries, if you've used a battery box
Parts list
- RFM95 w/ breakout (alternatively this)
- GPS (or this)
- microSD breakout
- DC in + USB-a power regulator (or maybe this)
- microSD Card - any card that's 1GiB+ will do.
- Arduino Uno
- Breadboard
- Jumper cables (e.g. a, b, and c)
- Power supply:
- Either a Battery and a breakout
- ....or a battery holder and a regulator
- Project box - if we can't 3D print one
- TPL-5110 - also available from Pimoroni
Constructing the circuit
Constructing the circuit itself is best done with the aid of a diagram:
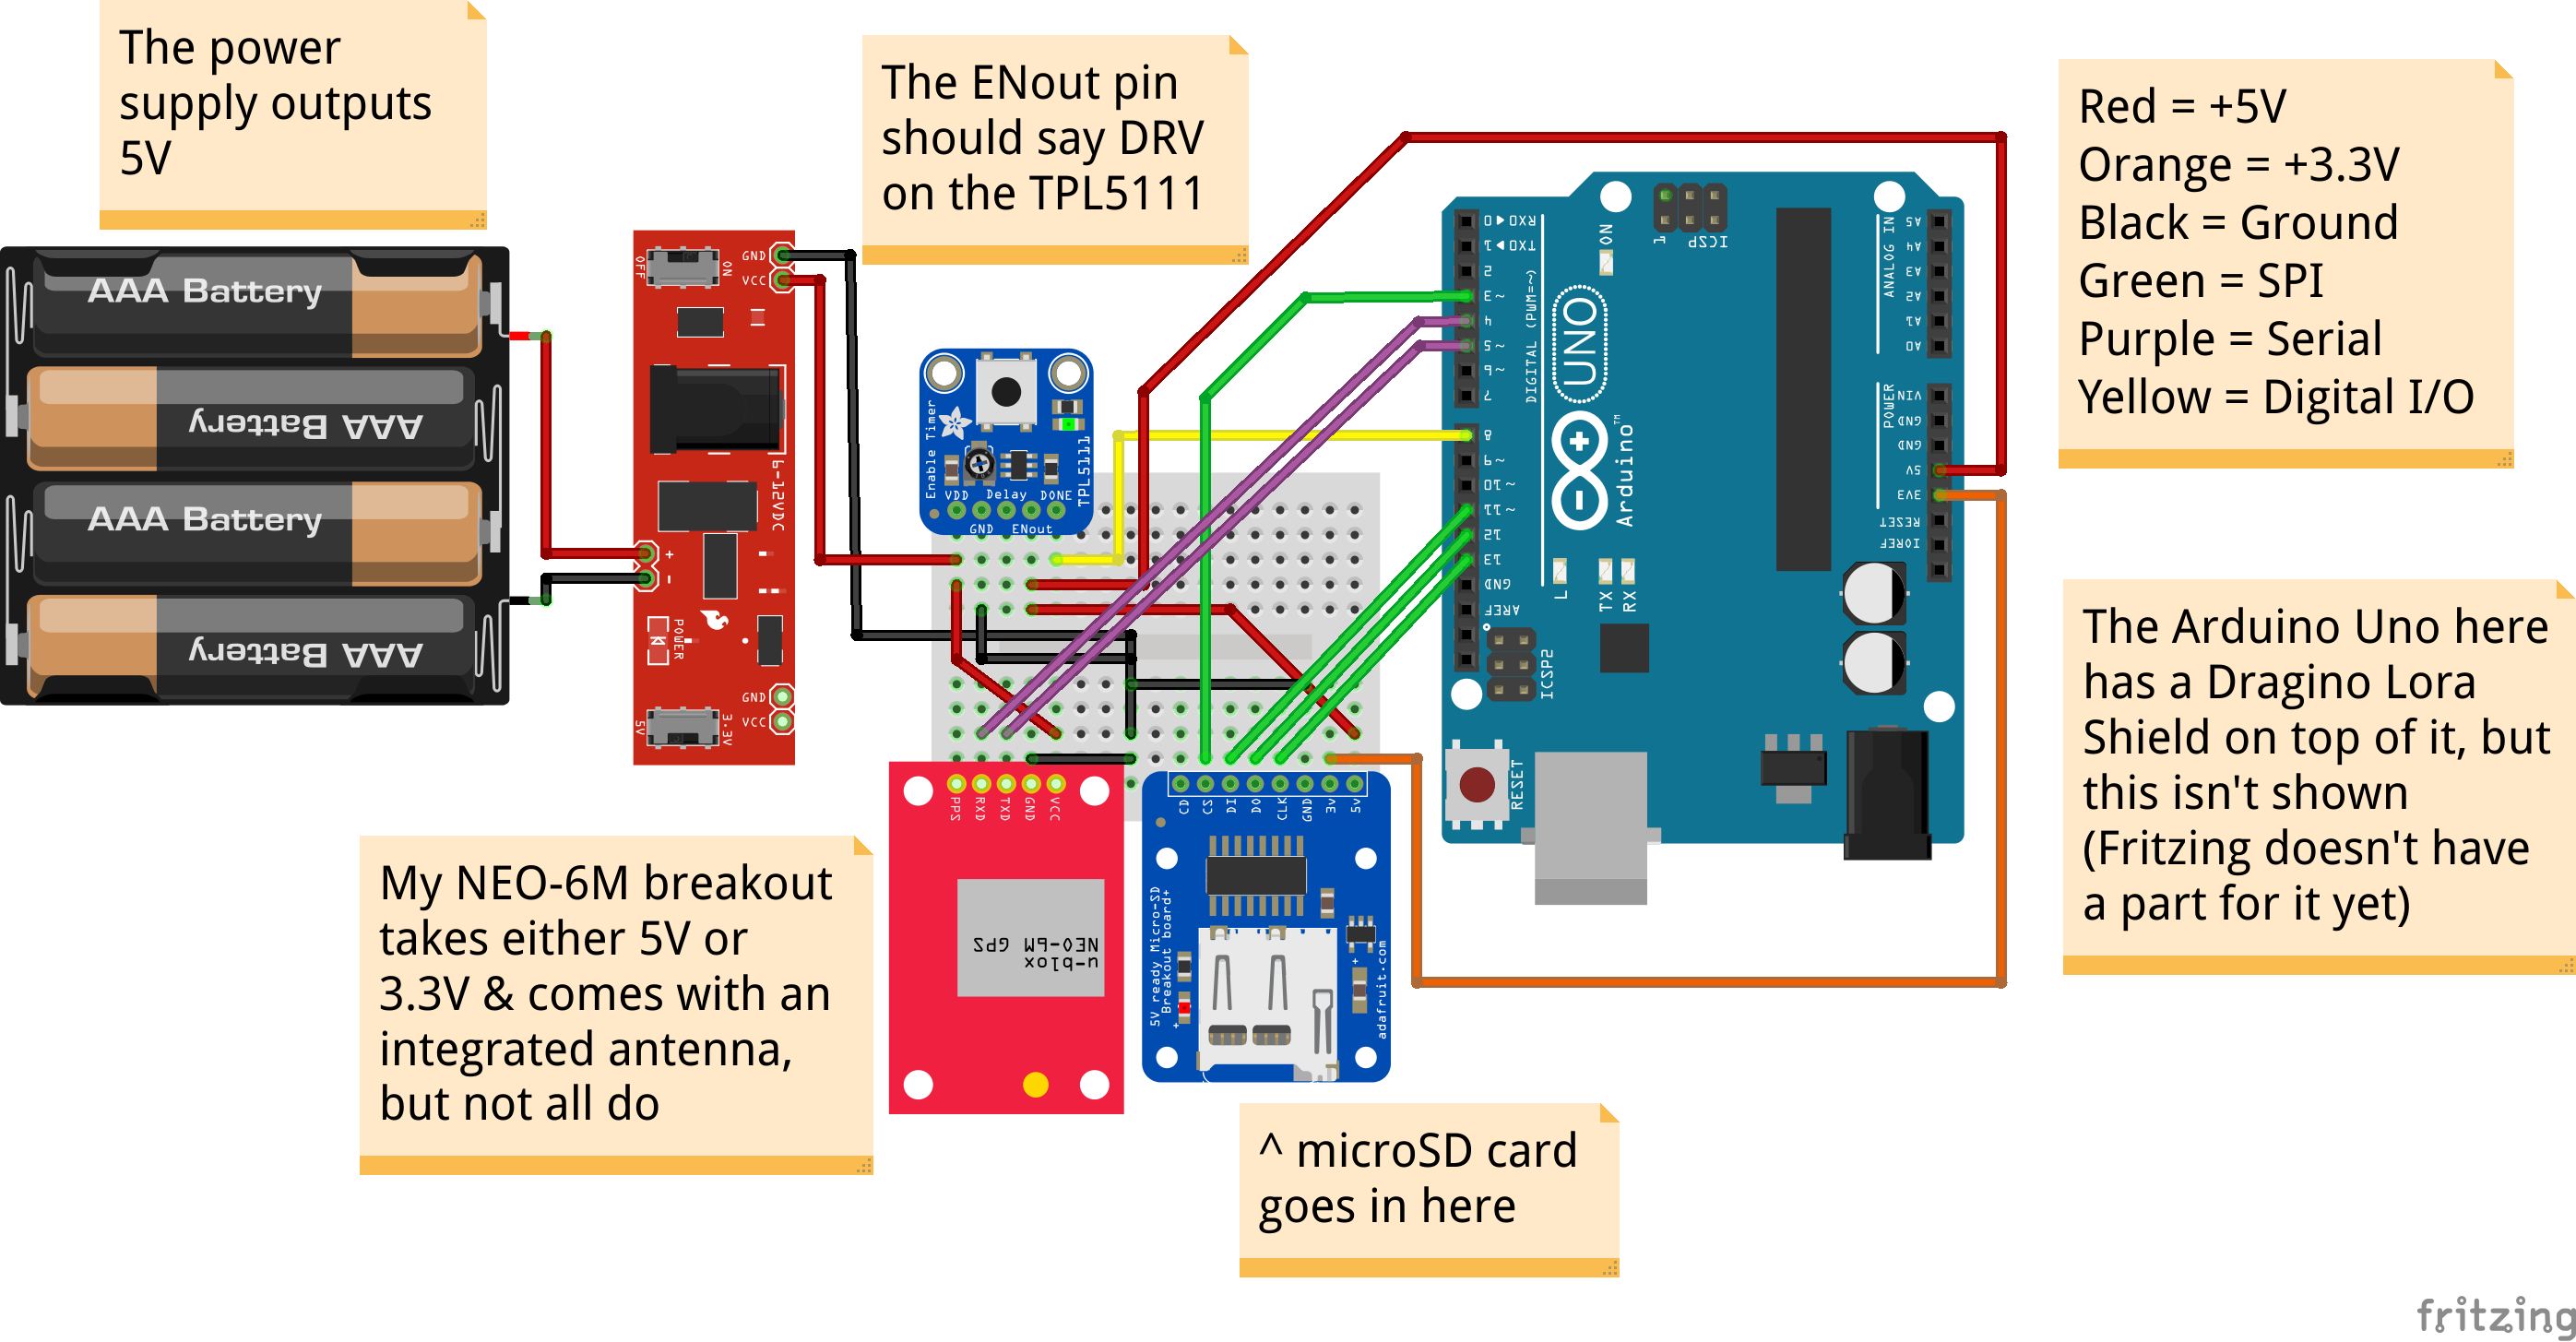
The above assumes that you've got a battery box and a regulator. A few things to note:
- We power the whole thing directly on the 5V power rail. This is because of the TPL5110, which turns the device on and off automatically.
- Because of the TPL5110, we have a 'timed power rail' and an 'untimed power rail', along with a shared ground.
- Note that the GPS module is connected to the untimed rail, as we really don't want to lose our GPS fix (as this would significantly delay us every time we take a reading).
When you've constructed the circuit, insert the microSD card into the microSD card breakout board.
Also, make sure to turn the potentiometer on the TPL5110 most of the way to the left, to reduce the time between readings to ~1m30s. It may take a few goes to adjust this to the right value - I recommend doing this after programming and watching the time between the readings coming in.
Note: The TPL5110 only reads the potentiometer when it first starts up! When you turn the potentiometer, you also need to remove and re-apply the power in order for it to recognise the change.
3d-printing the box
Once you've got the circuit built and tested, you'll want a box to put it in. Just such a box is available in this repository, as a pair of OpenSCAD files in iot/:
Housing.scad, containing the box itselfLid.scad, containing the lid
It's supplied in 2 parts, to make 3D printing easier. Yur 3D printer probably takes a .STL file though, so you'll need to export them in the correct format for printing.